Where To Cut LED Strip Lights: The Safe And Easy Way
Ever stared at an LED strip, scissors in hand, unsure where to cut? You’re not alone – and yes, you will know where to cut LED strip safely and easily.
In this guide, you’ll learn where to cut LED strips and how, without damaging them, how to fix mistakes, and even how to reconnect pieces – no fancy tools required.
Let’s light it up – safely.
Can You Cut LED Strip Lights? Here’s the Truth
The short answer: yes, you can cut LED strip lights – and if done properly, they’ll continue to work perfectly.
Most LED strips are designed with pre-marked cut points, typically every 3 or 6 LEDs, depending on the type. These are small copper pads that make it safe to separate the strip without damaging the circuitry. Cutting anywhere else? That’s where things go wrong.
So to answer the big questions:
- Can you cut LEDs? Yes—but only at the marked spots.
- Will they still work after cutting? Yes—if you cut in the right place and reconnect properly.
Just like Accent Light’s DIY-friendly panels, LED strips are made for customization. The key is knowing your product and following the right steps.
Where to Cut LED Strip Lights?
LED strip lights are engineered with specific cut points, and knowing where to cut LED strip is key to maintaining their function. These points are typically found every 2.5 inches (or every 3 LEDs), depending on the model.
Cutting anywhere other than these designated points can damage the strip and prevent it from lighting up correctly.
How to Identify Cut Points
- Look for pairs of small copper pads spaced evenly along the strip, typically every 2.5 inches.
- Most manufacturers mark these with a subtle line or even a scissors icon.
- For waterproof LED strips, carefully peel back the silicone layer to expose the copper pads underneath.
How to Cut
Use a sharp pair of scissors or a precision blade to cut directly across the center of the copper pads. A clean cut ensures the strip can be reconnected or powered from that point without issue.
Their built-in LED channels allow for precise placement, clean lines, and a finished look-ideal for accent walls and modern design projects.
Step-by-Step: How to Cut LED Strip Lights Safely
Where to cut LED strip? Cutting LED strips is easy once you know what to look for. Here’s a safe, simple process to ensure your lights stay functional and fabulous.
What You’ll Need:
- LED strip lights (ensure they are powered off)
- Sharp scissors or a precision knife
- Ruler or measuring tape (optional for spacing)
- Clean, flat surface to work on
Steps to Follow:
- Unroll the Strip and Locate the Cut Points: Lay your LED strip flat and find the copper pads spaced at regular intervals – usually every 2.5 inches.
- Double-check that the Power is Off: Never cut a live LED strip. Disconnect it from any power source before handling.
- Line Up Your Cut: Use your scissors or knife to cut directly through the center of the copper pads. A straight cut ensures a clean circuit.
- Inspect the Cut End: Make sure the copper pads are still visible and clean – this makes future connections easier if you need to reconnect the strip.
- Test Before Installation: Reconnect the strip temporarily to confirm it still works. If all lights beyond the cut are functional, you’re good to go.
By combining this technique, your installation process becomes even more seamless. The LED channels guide the strip along the panel with precision, giving you a pro-level finish, without the pro.
Fixing and Reconnecting Cut LED Strip Lights
Cut your LED strip in the wrong spot – or don’t have connectors on hand? You can still fix and reconnect the strip with a little patience and the right technique.
Step 1: Assess the Damage
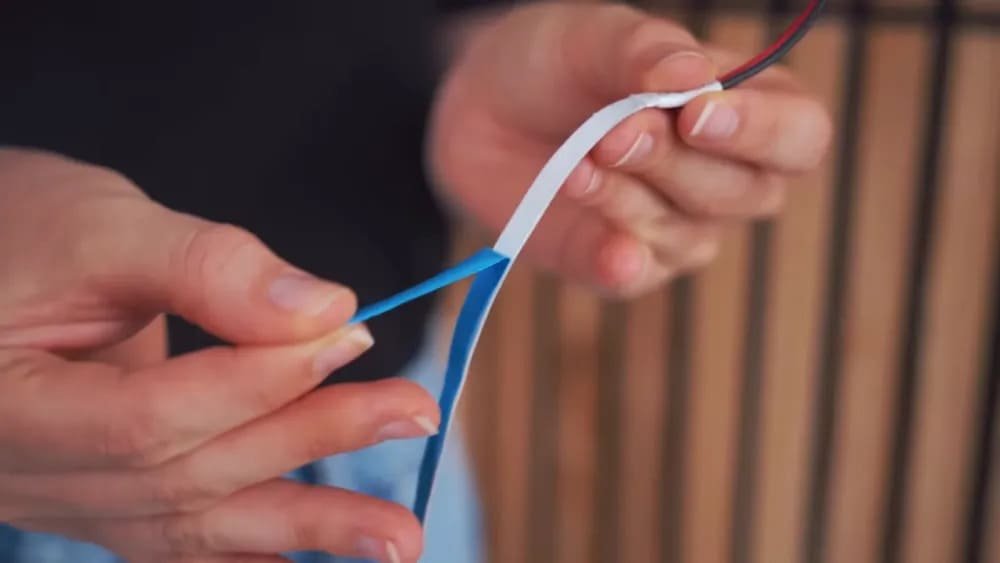
Start by examining both cut ends. If each side still shows clean copper pads, you’re in luck – they can be reconnected. If you accidentally cut between pads, that section won’t be salvageable.
Step 2: Prepare the Pads
Gently strip back any silicone coating to expose the copper. Make sure the pads are clean and intact.
Step 3: Reconnect Without Connectors
Don’t have LED clips? Use a soldering iron and a bit of wire to bridge the gap between matching pads (+ to +, G to G, etc.). It’s a straightforward way to restore the electrical path – just take your time and double-check your polarity.
Step 4: Insulate the Joint
After soldering, wrap the area with electrical tape or use heat-shrink tubing to protect the connection. This is especially important for waterproof strips or when embedding the strip inside wood paneling.
Step 5: Test Before Mounting
Power on the strip to make sure it lights up fully. If it does, you’ve successfully repaired it – no connectors needed.
This approach pairs especially well that include built-in LED channels. You can make adjustments as needed, tuck your wiring behind the panels, and enjoy a seamless, illuminated feature wall without any visible mess.
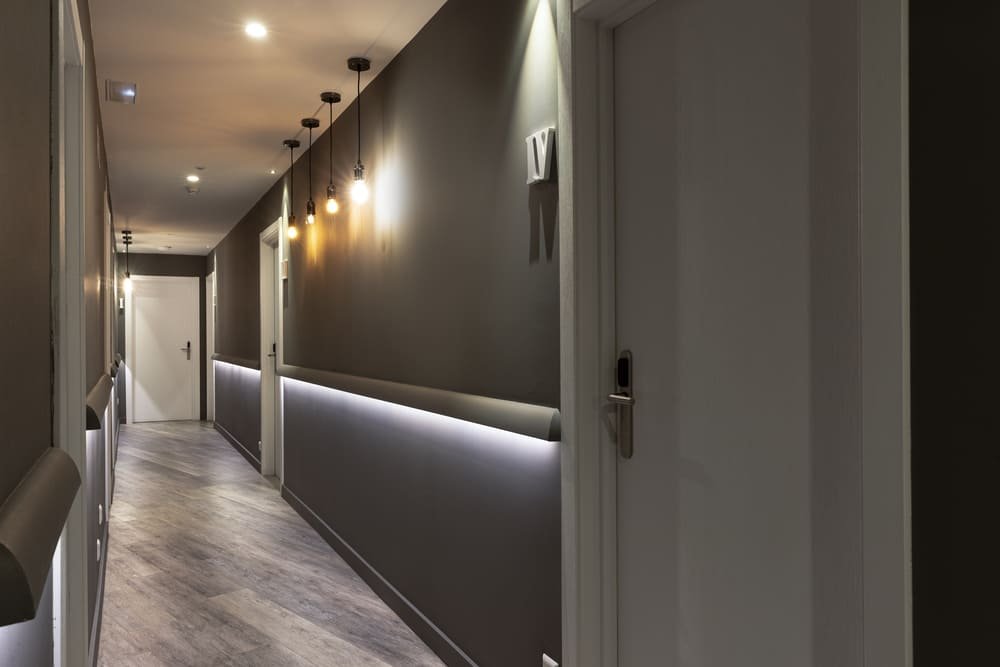
Pairing LED Strips with Woody Walls Slat Panels: The Perfect Match
Whether you’re fixing a bad cut or customizing your lighting layout, where to cut the LED strip and how it matters. And when it comes to creating a finished look that blends warmth with modern style, nothing beats combining LED strip lights with LED Channel for Wood Slat Wall Panels.
These panels are designed with built-in LED channels, making it incredibly easy to align your lighting perfectly – no guesswork, no mess. The result? A sleek, backlit feature wall that elevates your entire space, whether it’s a living room, office, or media room.
Even better, all Accent Light panels are DIY-friendly, shipped free across the mainland U.S., and in stock, ready to ship within 48 hours. You get stunning design and smart lighting integration – all without the need for a contractor.
Ready to Light It Up?
Now that you know exactly where to cut LED strip safely, confidently move forward with your project. From fixing miscuts to custom lighting layouts, you’ve got the know-how.
Transform your space with light, texture, and ease – explore Accent Light LED-compatible wall panels today.